OpenTofu and GitHub Actions - "secret-less" IaC
Passwords and secrets are the bane of the IT guys existence. Can we reduce the need?
Is it really secret-less?
Well, kinda.
With a combination of user-assigned managed identities, GitHub Actions and some hopes and prayers you can deploy infrastructure without having to be too concerned about leaking secrets. The identities are directly associated with the GitHub repository.
This crazy idea comes courtesy of OpenTofu and their latest alpha release 1.8.0-alpha1. This version introduces allowing usage of variables and locals in backends, module sources and encryption configuration. For those already familiar with using Terraform/OpenTofu you’ll notice that this is quite a big deal.
I will be glossing over the detailed explanations of assigning permissions to identities, as this is something you should be aware of already if you’re looking at this kind of technology.
How does it work?
We won’t get into the deep details here. There are people much smarter than I who can and will provide way more information. The purpose behind my posts is to keep it as brief as possible, whilst reminding you that I’m keeping it as brief as possible.
You can grant a user-assigned managed identity access rights to create resources, and federate this identity with a particular GitHub repo. With a combination of the Tenant ID, Subscription ID and Client ID (of the user-assigned managed identity) you can successfully create resources.
Creating the identity
First, you need the identity. You can create this quickly through Cloud Shell in the top corner of your Azure Portal window using the command below. Unless you also have a Resource Group named MyFantasticResourceGroup, make sure to change that.
1
az identity create --resource-group MyFantasticResourceGroup --name MySecretlessKey

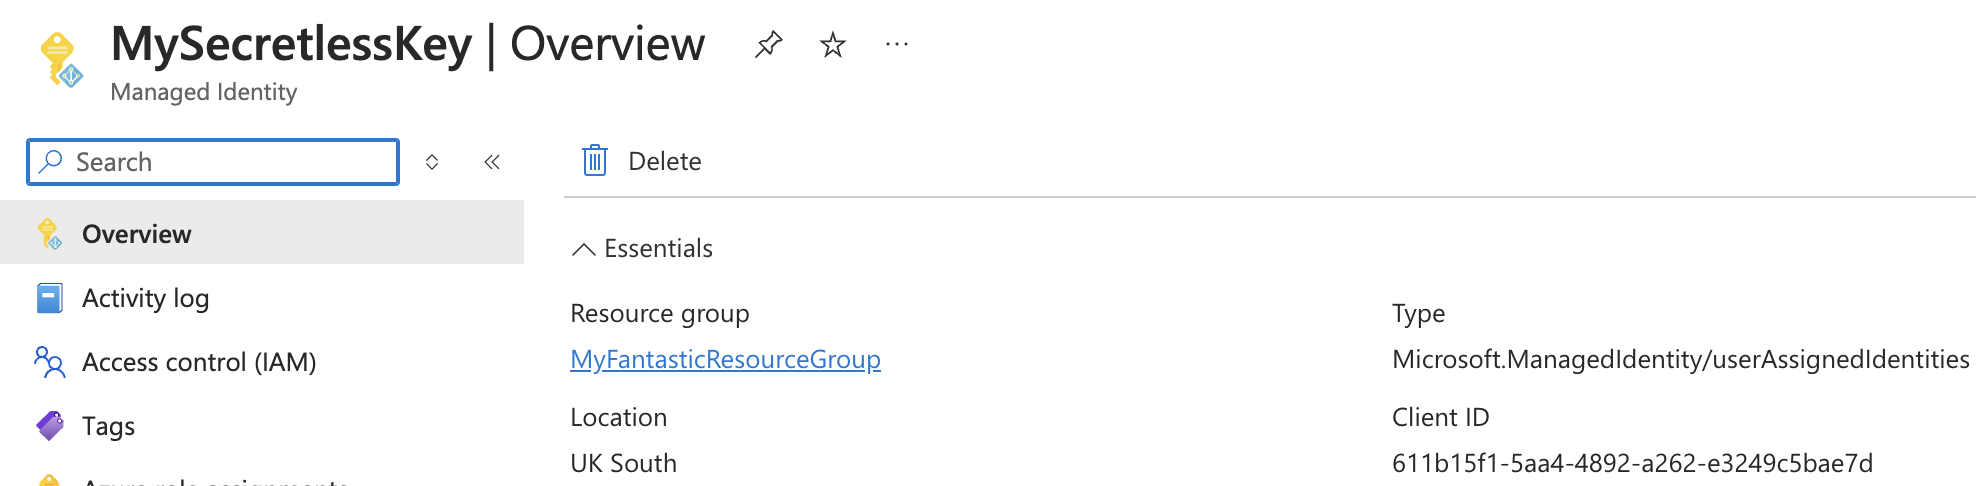
Next browse to the Managed Identity (MI). You can create it here too obviously, I just wanted to be fancy. Search for Managed Identities in the Azure Portal, and in that list you’ll find your key. Click into the key and take a copy of the Client ID.
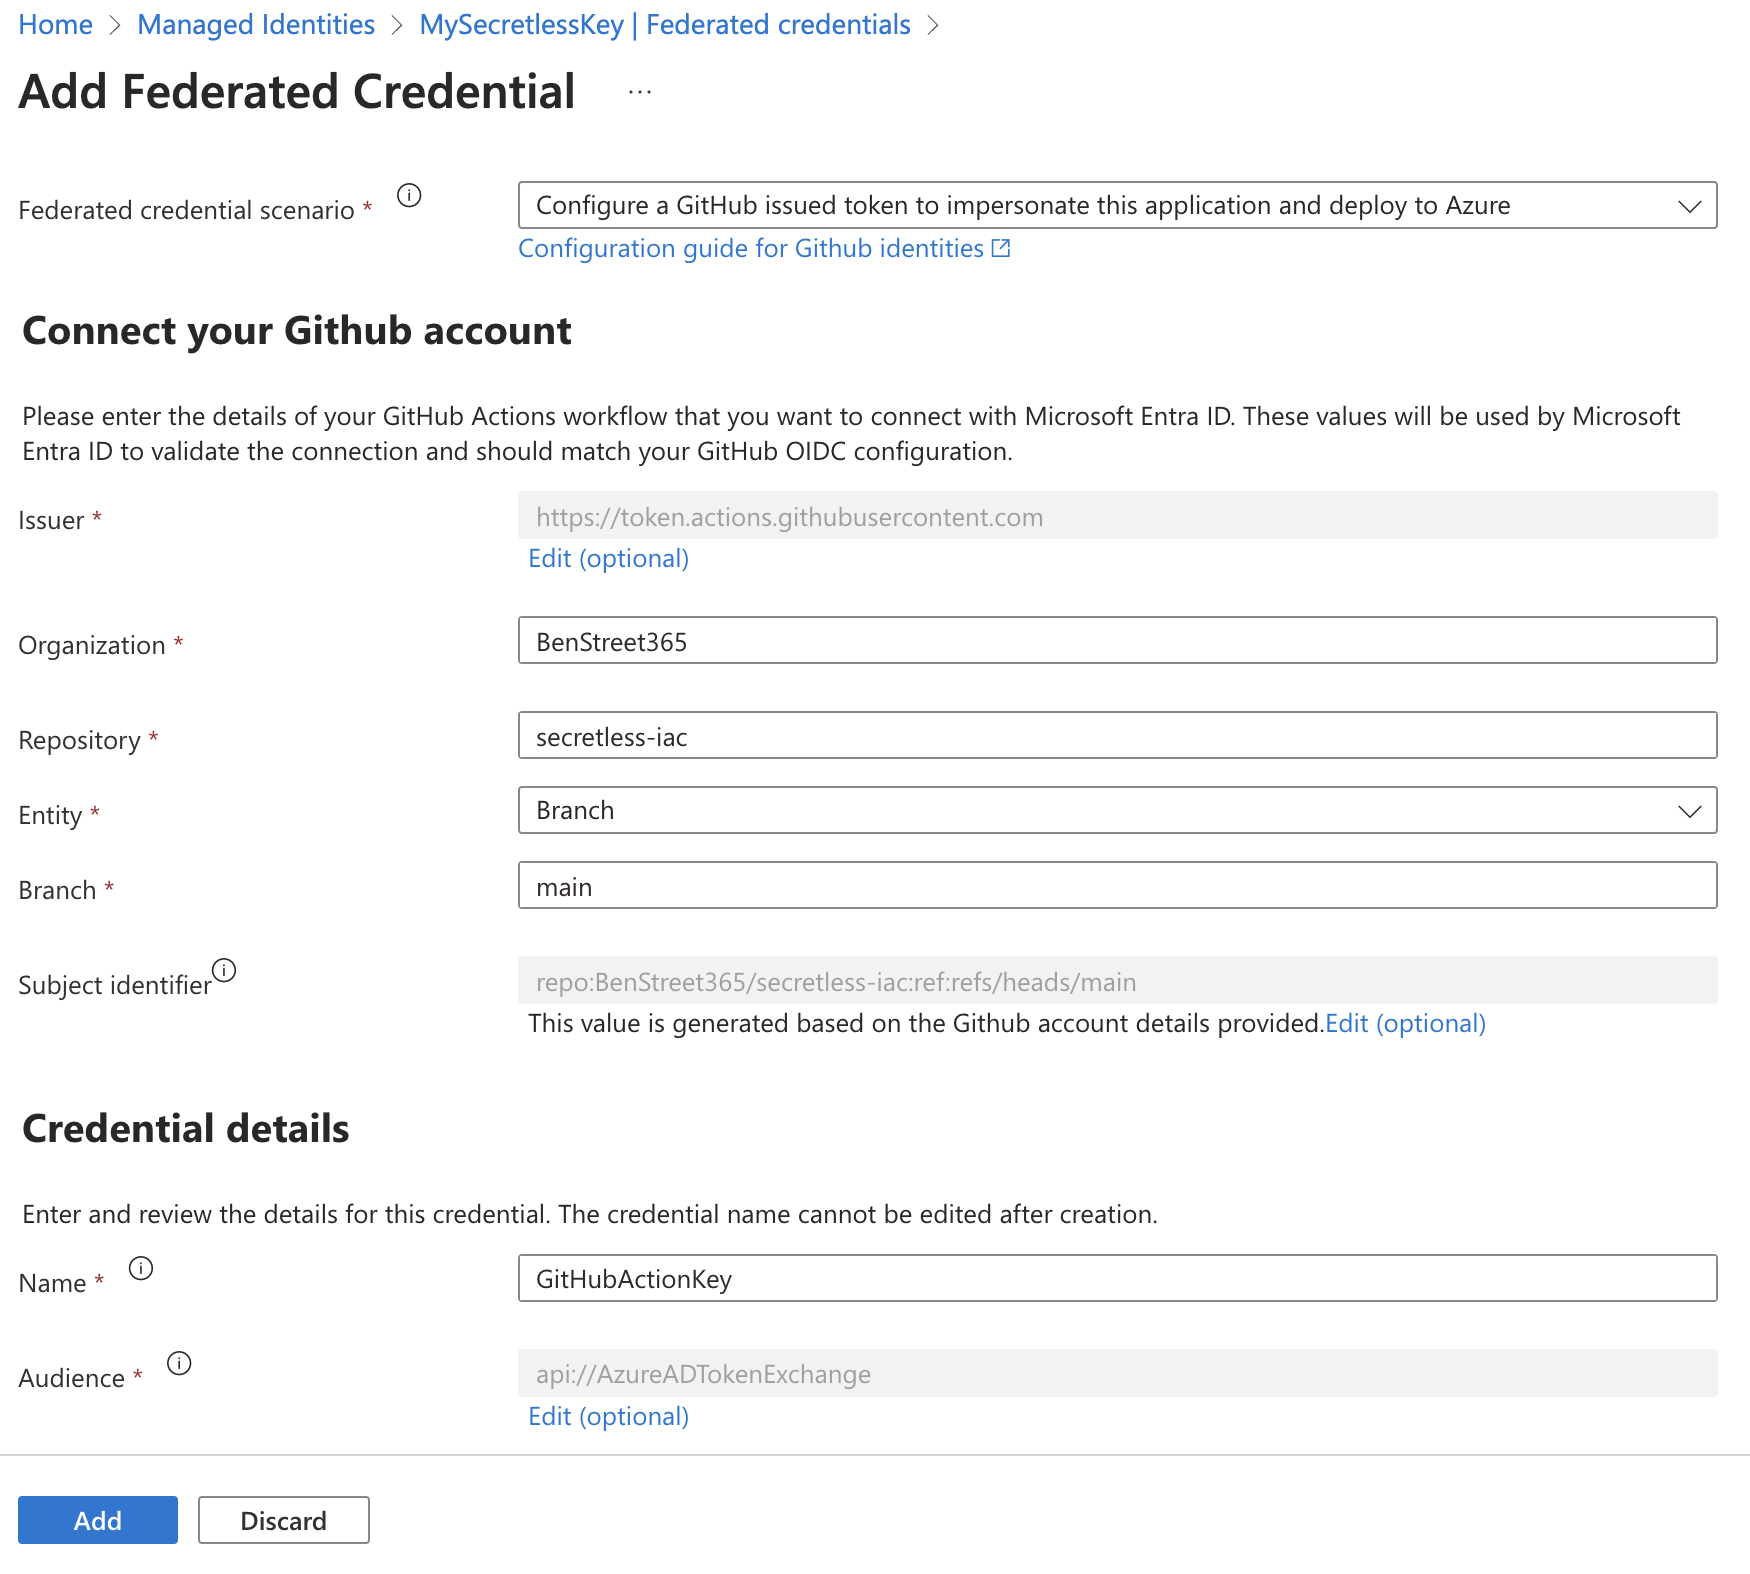
Next go to Settings - Federated Credentials. Select ‘Add Credential’ and choose ‘GitHub Actions deploying Azure Resources’ from the dropdown. Fill out the information it requests, then click ‘Add’. The entity you choose will be the only one able to use this MI through this Federated Credential. You can add more, for different branches or pull requests etc.
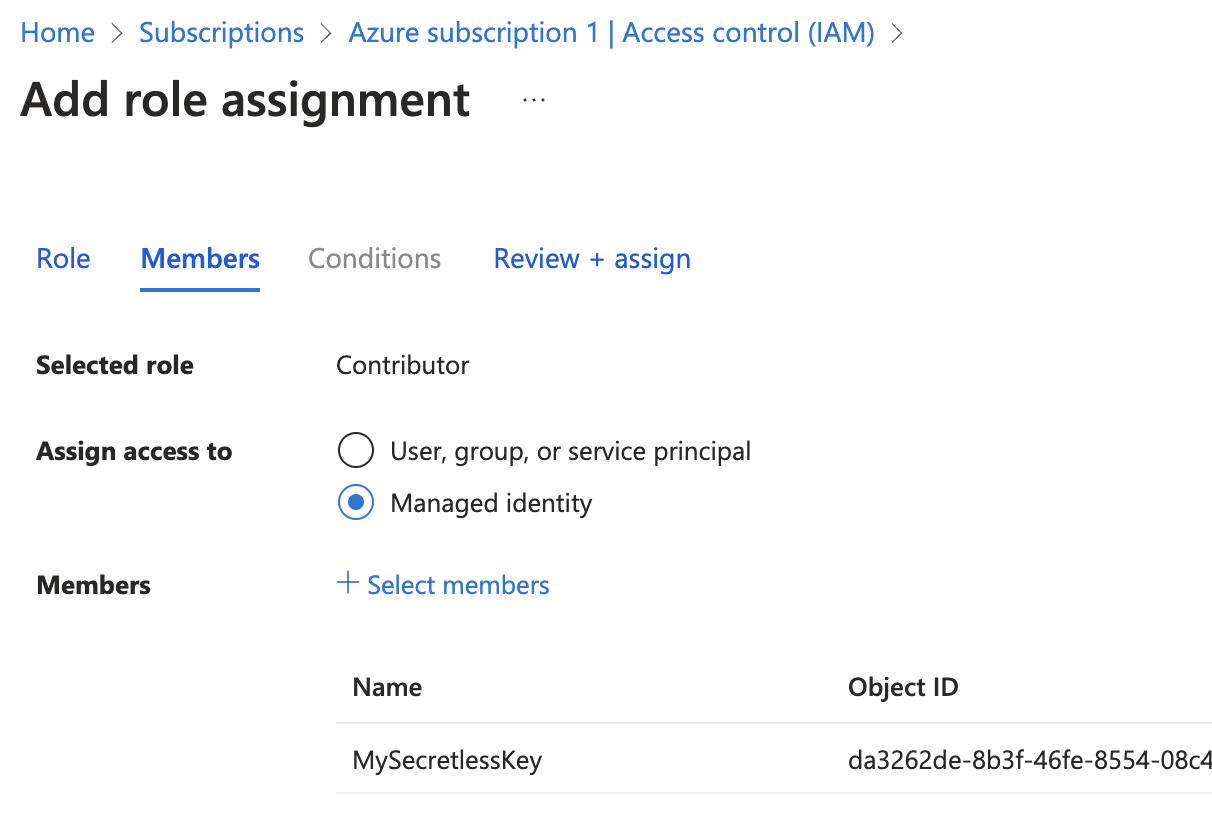
Lastly, we just need to grant our identity some permissions to make the changes it needs. For the purpose of this article, I’m just going to give it Contributor rights to my Subscription.
Preparing the GitHub repo
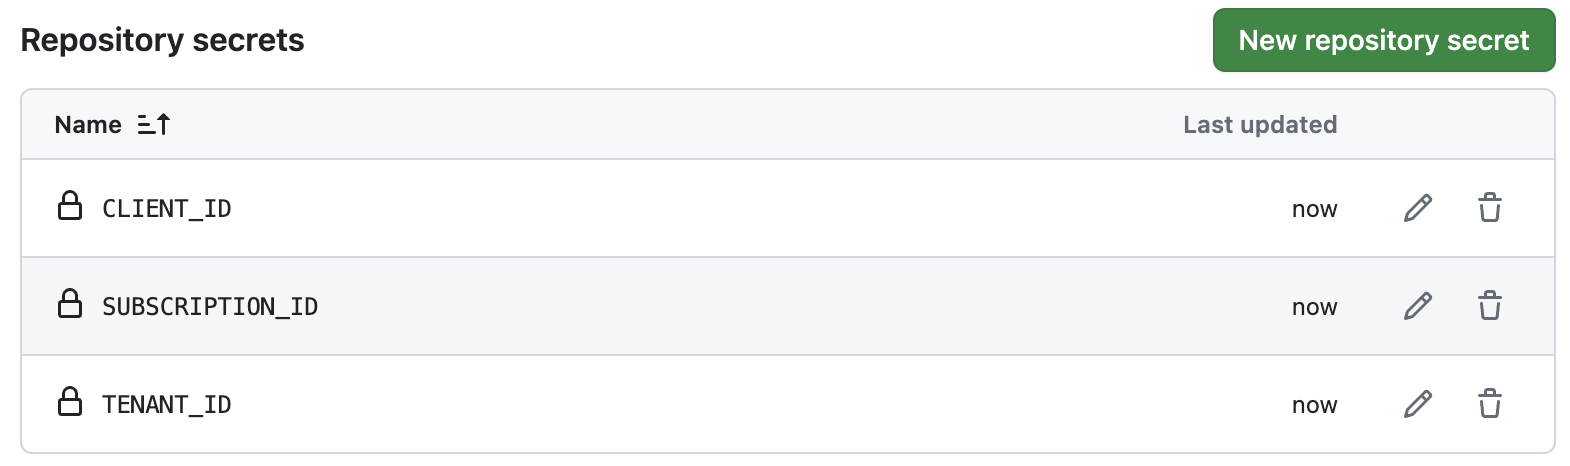
We will now hop over to GitHub where we will drop in the necessary secrets. Go to your GitHub Repo, go to Settings and select Secrets and variables, then Actions. Select ‘New repository secret’. You should then have three secrets stored.
You may be thinking at this point “Ben, you said this was secret-less.”
You’re right, I did. The difference is the risk factor. This is not a Service Principal secret, which a threat actor could exploit. It’s also not using Azure CLI to login. This is a simple identity made available to this exact GitHub Repo and nothing else. It is worthless when not used by the repo. This is the key takeaway from the whole article. So, do I think it’s sensitive? No. Do I think you should plaintext the GUID for the world to see? Also no - mine will be deleted after this article goes live.
Deploying the code
I will be kind at this part, and provide both the workflow files needed and a main.tf file to create your first resource in this secretless future. I will highlight this code is not good practice, and is just an example to prove how it’s done.
Below is your main.tf file. This will create a nice simple resource group.
1
2
3
4
5
6
7
8
9
10
11
12
13
14
15
16
variable "client_id" {} # Declares the variables for usage
variable "tenant_id" {}
variable "subscription_id" {}

provider "azurerm" {
  features {}
  tenant_id = var.tenant_id
  client_id = var.client_id
  subscription_id = var.subscription_id
  use_oidc = true # Required to authenticate correctly
}

resource "azurerm_resource_group" "rg" {
  location = "uksouth"
  name     = "MySecretlessRG"
}
Below is your YAML file. This will need to be placed in the /.github/workflows filepath, named anything you like. I called this actions.yml.
1
2
3
4
5
6
7
8
9
10
11
12
13
14
15
16
17
18
19
20
21
22
23
24
25
26
27
28
29
30
31
32
33
34
name: Deploy Secretless Infrastructure

on:
  push:
    branches:
      - main # deploys everytime code is commited to main

permissions: # provides the necessary permissions for the runner
  id-token: write
  contents: read

jobs:
  deploy:
    runs-on: ubuntu-latest # uses an Ubuntu GitHub-hosted runner

    steps:
      - name: Checkout code # Checks out the repository
        uses: actions/checkout@v4

      - name: OpenTofu # Prepares OpenTofu - downloading the alpha required
        uses: opentofu/[email protected]
        with:
          tofu_version: 1.8.0-alpha1

      - name: Deploy infrastructure
        # The code below imports the variables made available, then allows them to be used by Tofu by prefixing with TF_VAR_
        run: |
          tofu init
          tofu apply -auto-approve
        env:
          TF_VAR_client_id: ${{ secrets.CLIENT_ID }} # Brings in the secrets from the GitHub Repo
          TF_VAR_tenant_id: ${{ secrets.TENANT_ID }}
          TF_VAR_subscription_id: ${{ secrets.SUBSCRIPTION_ID }}
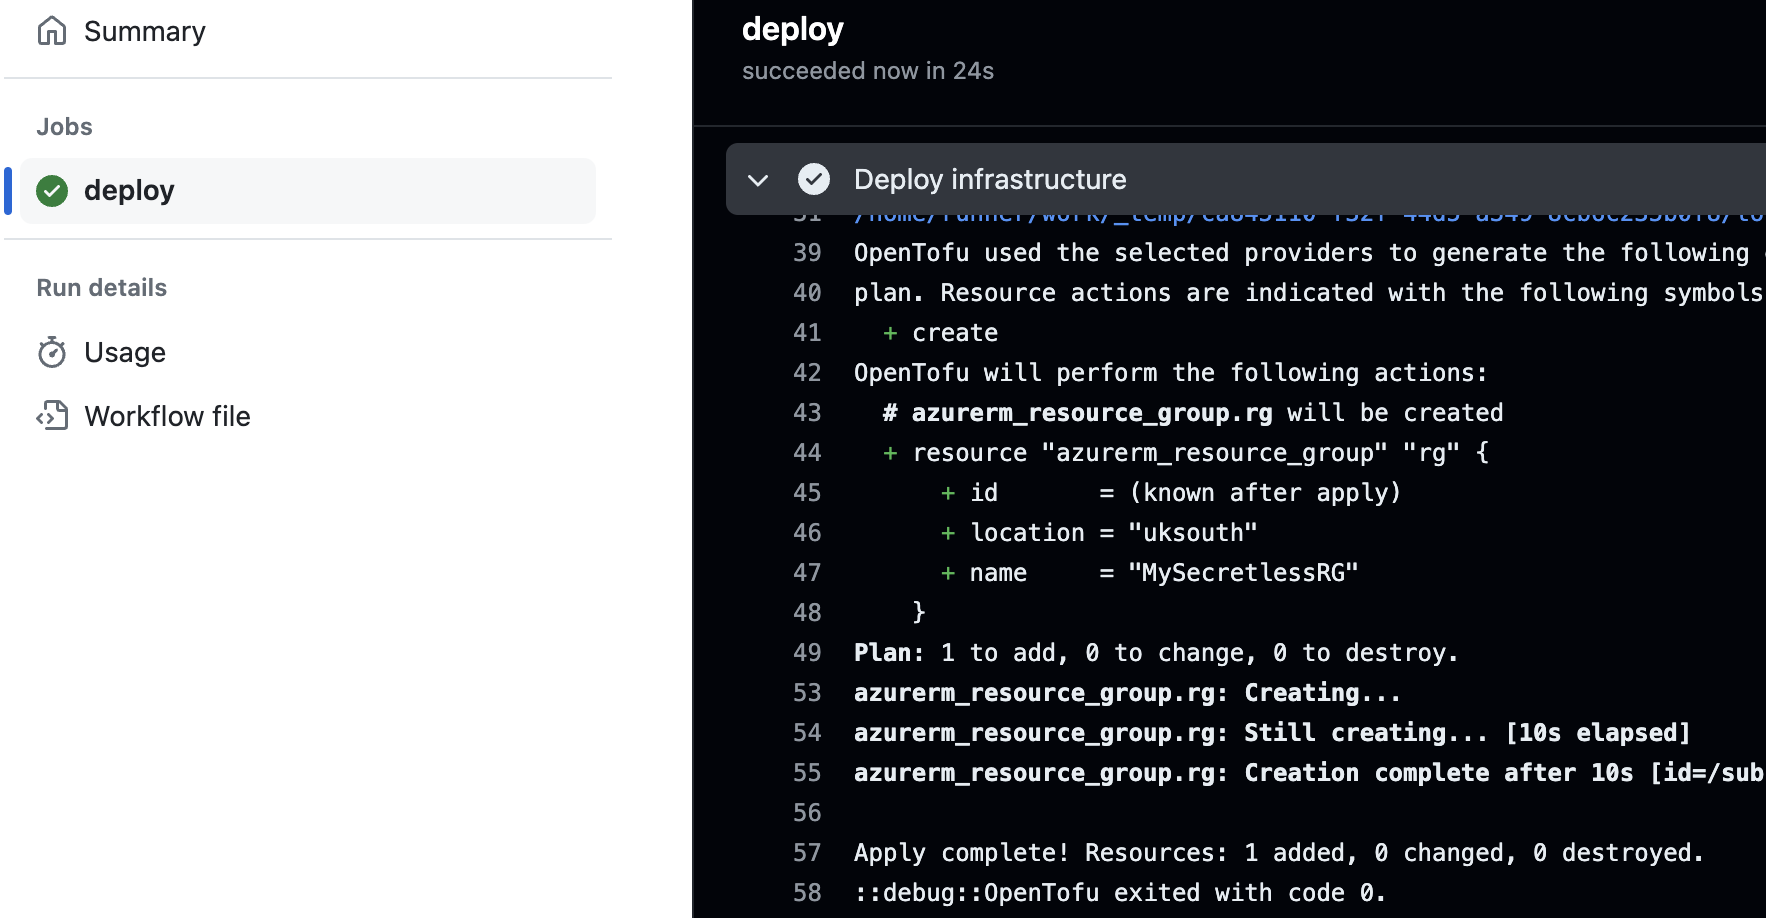
Once this code is merged to the main channel on your repo, you can check the progress through the Actions tab. If you’ve done everything correctly, and my instructions have been good enough, you should be greeted with a nice green tick and when you check Azure you should see your new resource group.
Final thoughts
Personally, I would now say that this is a secretless method to be able to deploy infrastructure through IaC. Whilst not truly secretless in a sense of there’s no identities involved at all, the sensitivity of the information used is instead deemed much less risky and that’s a winner for everyone. Please don’t use the code above for anything other than a proof of concept, it’s all for example purposes only. Your missing state file for starters would cause you some great concern.
A quick mention to The Linux Foundation and the contributors towards the OpenTofu open-source project that have done excellent work with OpenTofu as an alternative to Terraform.
Have a great weekend.