App Control for Business for regular humans - Part 1
Get started securing your machines with App Control for Business
App Control for Business (ACfB) for regular humans
Getting started
This technology was previously named Windows Defender Application Control, so you will potentially still see references to this name.
ACfB is a similar technology to Windows AppLocker. I say similar, as the two systems exist side-by-side currently and can even be used together. This post is to help SysAdmins to get started with ACfB. ACfB stores its config with C:\Windows\System32\CodeIntegrity\CiPolicies\Active. Here you will find all of the CIP files currently in place for your system. Even on a fresh build, there will be entries in here - Microsoft use these to block particularly hazardous files.
ACfB is really powerful. You can brick your machine with little to no effort, so I really must stress that you need to test your policies well. ACfB allows you to restrict what applications you can run on your business machines. As an example, if you’re rolling out Microsoft Edge and you want to insist on your staff not downloading Google Chrome (correct move, by the way) then with well configured ACfB policy you can do exactly that. Looping back to that first comment though - you can also block Microsoft applications so… take that as a warning.
I’m going to repeat myself, test this before rolling out to any machines - even your own. Moving on!
ACfB Wizard
A great place to start is the WDAC Wizard. You might be like me, where you’d rather do this in PowerShell or manually. In this instance I would strongly suggest sticking to the wizard to start with.
Building the Base policy
Your scenario may be different but companies I support always use Microsoft technologies such as Teams. Open up ACfB Wizard, select ‘Policy Creator’. Leave Multiple Policy Format and Base policy selected, then click next.
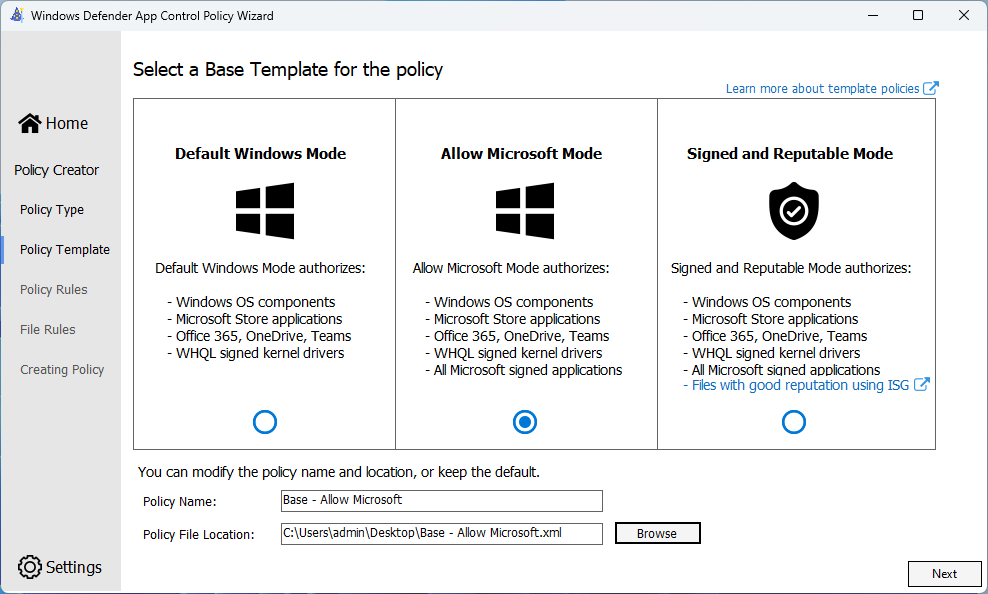
I tend to use ‘Allow Microsoft mode’, but it’s best to use what is best for your scenario. In some lightly managed instances, the right hand option with the ISG could be enough without any other policies needed.
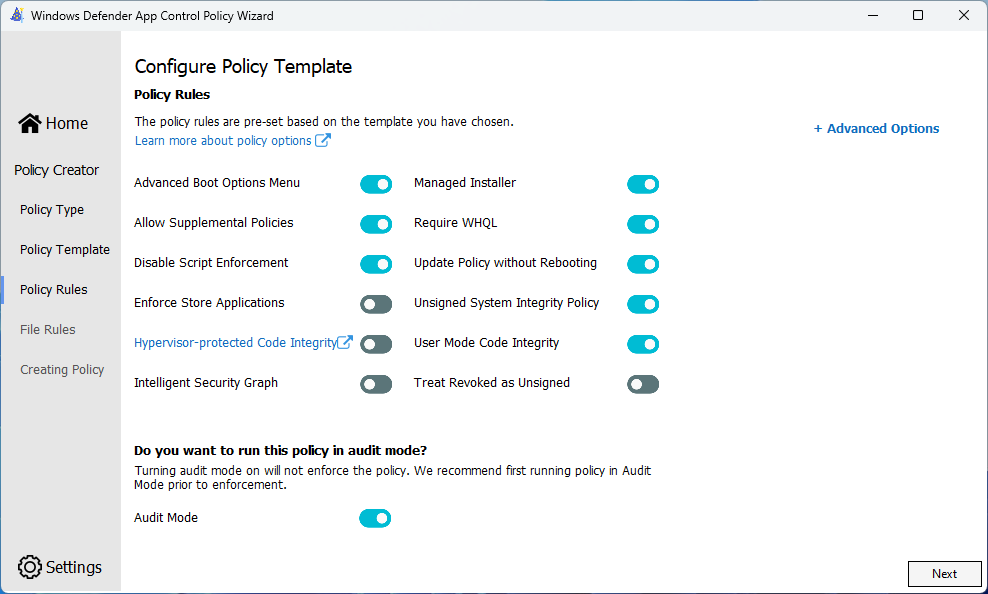
The next page we select what additional features in ACfB we should use. The changes I make from the defaults are ‘Disable script enforcement’, ‘Managed Installer’, and ‘Require WHQL’.
- Disable script enforcement - this puts PowerShell into Restricted Mode
- Managed Installer - this adds Intune as a trusted source for applications
- Require WHQL - this requires WHQL drivers to be signed to run
You will also need to turn Audit mode off, if you’re planning to test the functionality.
Additional options can be seen in more detail here.
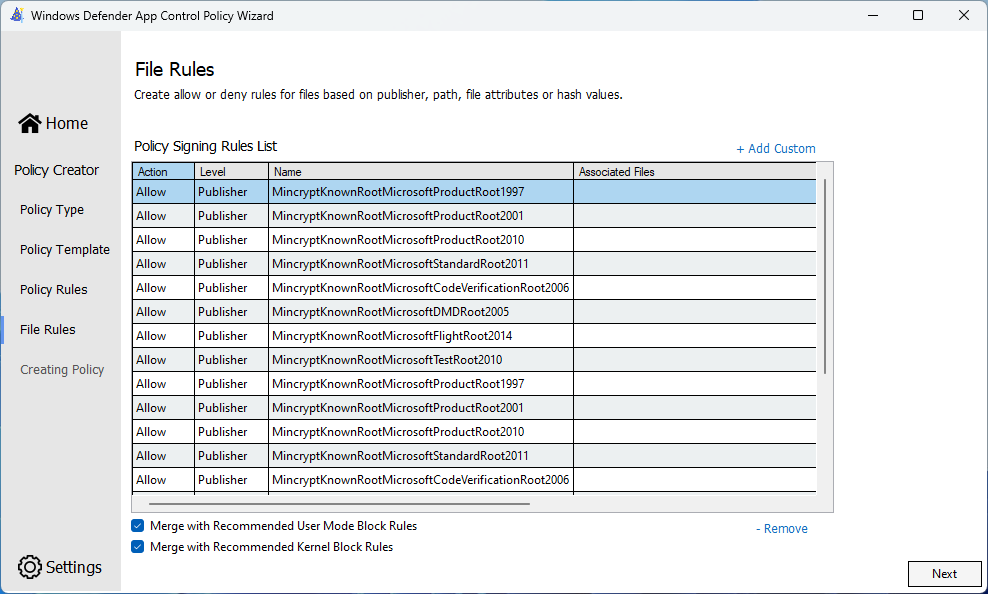
With this default Base policy configuration, and checking the boxes to take in the other Microsoft recommendations, you’ve got a solid foundation in place that will allow a newly imaged to work without additional software. When you complete the wizard, you will be provided with an XML and CIP file. It is worth noting these other recommendations will disable a couple of system features such as Windows Subsystem for Linux.
There is currently a flaw in this method, where your users can bypass winget and Microsoft Store blocks by going to https://apps.microsoft.com. I will update this post in the future to block these too.
Building the Supplemental policy
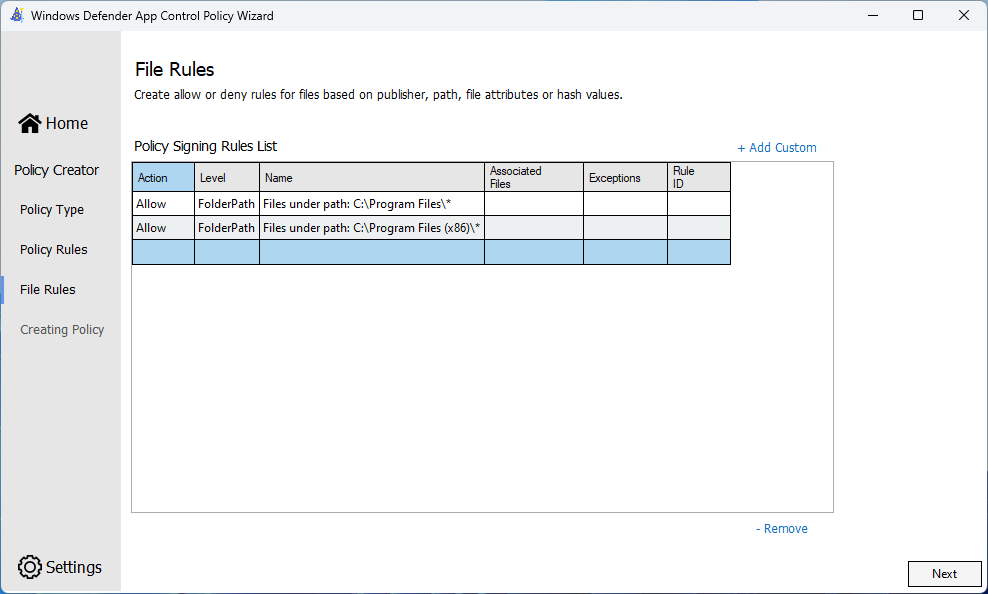
In a perfect world, we would be done here but we’ve got other things to allow through. A good place to start is allowing the entire Program Files folders through. This sounds less damaging than it really is. To be able to write to either of the Program Files folders, you need to be an Administrator on the device. It has been long accepted within the Security industry that if you have local Administrator to a device, it is game over anyway. You will save yourself considerable effort by simply allowing these folders.
To accomodate this, we’re going to make a Supplemental Policy. This is where things may start to sound confusing but here’s a shortened summary. The Base policy (highlighted above that we made earlier), is the default denial policy. Technically, it blocks pretty much everything except certain Microsoft technologies. These Supplemental policies are exceptions to the Base policy. This is what you as the Administrator are saying Windows is allowed to run as well as its base policy requirements. A Supplemental policy refers to the Base policy ID for the two to mesh together.
So, open up ACfB Wizard again and this time create a Supplemental policy. You will need to browse to the Base Policy, or provide the Base Policy GUID (found within the XML created). When creating a Supplemental policy, you’ll notice everything is a lot less crowded. We’re essentially starting with a clean slate.
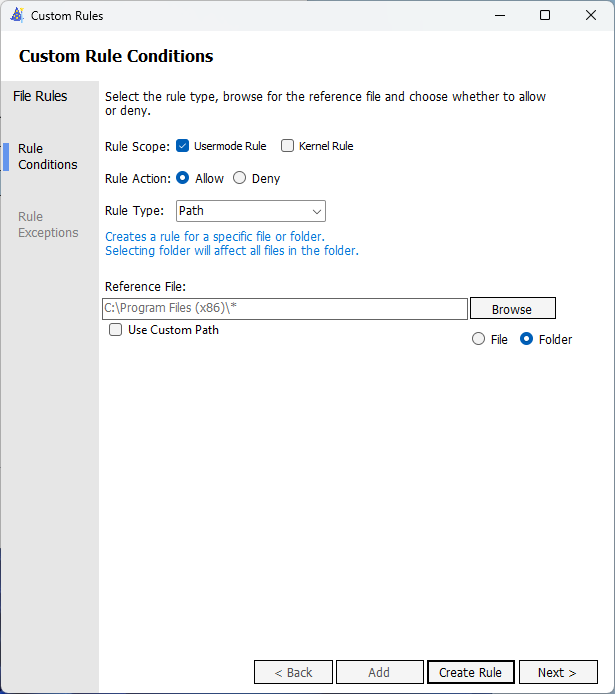
Change the dropdown to Path. For this policy, add in “C:\Program Files\*” and “C:\Program Files (x86)\*”. When you are done, you’ll have your two sets of policy files. You will need to change this to Usermode rule as well where you will be greeted with a popup. Either option can be chosen in the popup, as it was defined in the Base policy and the Supplemental inherits it. This is a problem with the wizard at time of writing.
Testing and wrapping up
You now have your Base and Supplemental policies. A quick and easy way to test these policies is using a Windows 11 VM, or even Windows Sandbox. I would suggest the VM route in this instance for a more realistic machine. Take the two CIP files that were created from our policies, and drop them in C:\Windows\System32\CodeIntegrity\CiPolicies\Active. These policies work quite fast and don’t require a reboot - but I reboot anyway.
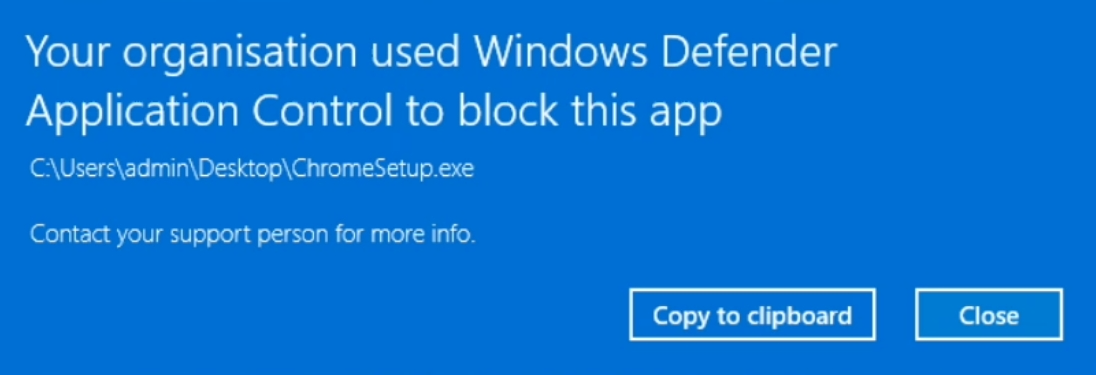
A quick and easy test is to go and download Google Chrome to see if it runs. If all has gone to plan, then you should get a big error saying that ACfB has blocked the file from running. If you do, Congratulations! Best move on to Part 2.
